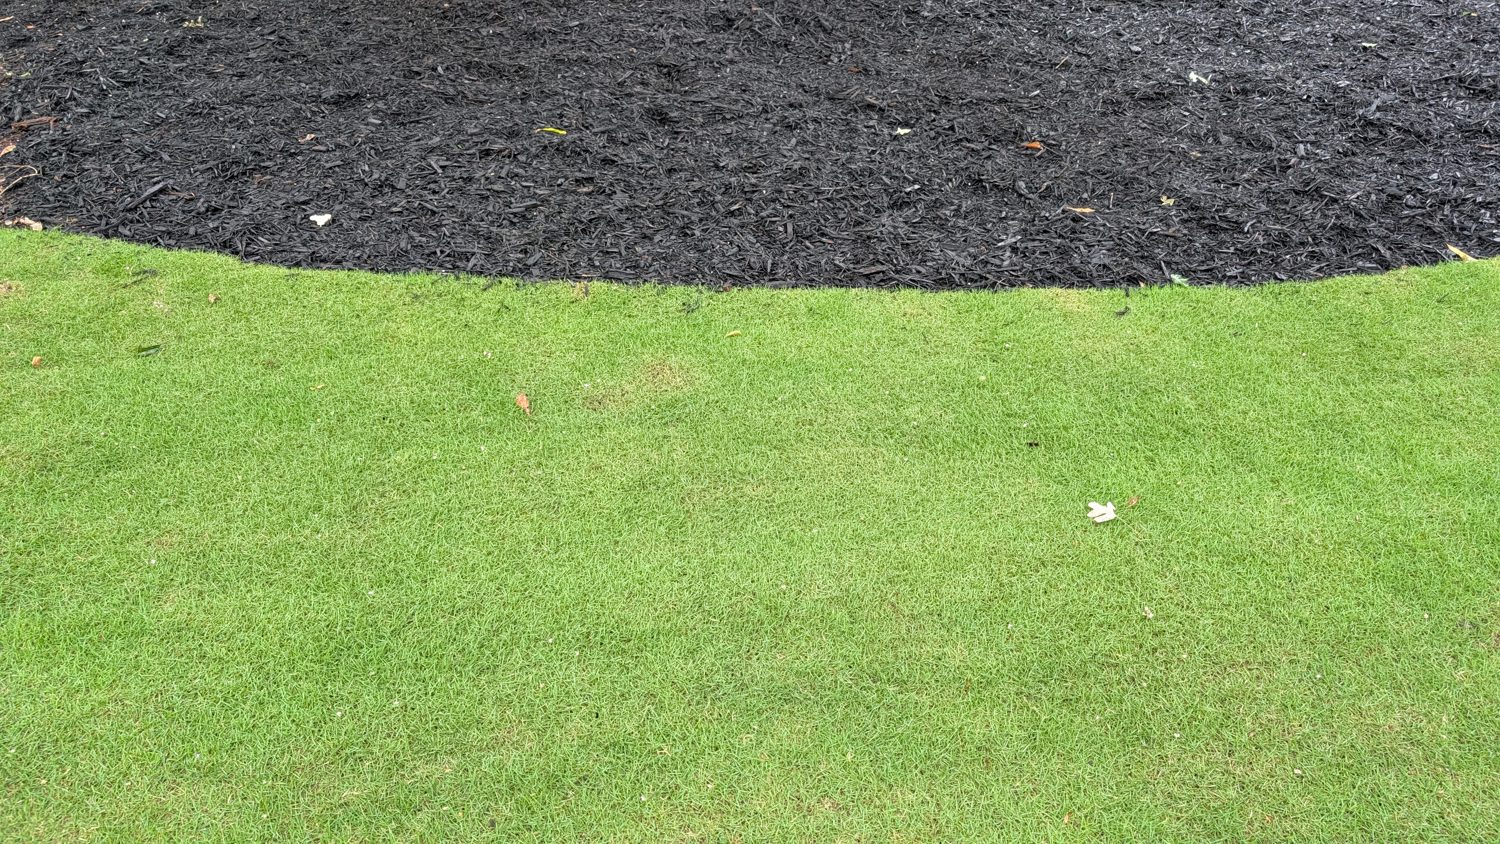
Bed Edging: The Cheapest Way to Make Your Lawn Look Like a Pro Did It
Your lawn is only half the picture.
The edges and beds are the frame. A bad frame ruins good art, and ragged beds undercut even a well-managed lawn. A mediocre lawn with crisp edges looks intentional. A perfect lawn with ragged edges just looks neglected.
I say this as someone who has spent real time and real money on the chemistry side of lawn care, pre-emergents, fungicides, PGR schedules, iron tank mixes. Fresh edging and a couple bags of black mulch will do more for the visual impression of your yard than any of that. It takes an afternoon. The tools are cheap.
This is also one of my favorite projects of the year, which is how a Saturday afternoon with a toddler and a toy shovel turned into the most satisfying thing I’ve done to this property in months.
I did the front foundation beds this June: the row of boxwoods along the front of the house, plus the gold euonymus out by the corner. The edge had crept and gone soft over the winter, and last year’s mulch had faded to a flat gray. A few hours with the edger and a stack of black dyed mulch, and it looked like I’d paid a crew for it. My daughter ran the toy shovel the whole time. She didn’t move much mulch, but that’s not really the point.
Some links on this page are affiliate links. If you buy through one, I may earn a commission at no extra cost to you. It doesn’t change the picks. How I choose products.
The short shopping list: AMES saw-tooth border edger · power bed edger (~$89.99) if your bed lines are long or root-bound. All picks and why.
Why This Matters
Lawn care content almost never talks about beds and edges. The focus is always on the turf: what pre-emergent to use, which fertilizer, whether to aerate in fall or spring. Beds get treated as landscaping, somebody else’s department.
That’s backwards. In a typical suburban yard, the beds and edge lines are the first thing anyone sees. The driveway beds, the foundation beds, the island around the mailbox, those are at eye level, up close, as you walk to the door. The lawn is in the background. Yet most homeowners spend the entire spring buying bags of granular fertilizer and none of it on a $6 bag of mulch that would do more for curb appeal.
Clean edges have a functional side too. A defined trench at the bed edge is a physical barrier that slows grass encroachment into the bed. Good mulch depth (2–3 inches, no more) suppresses weeds, retains soil moisture, and moderates soil temperature. All things that reduce maintenance work throughout the season. The edge and the mulch are doing real work, not just looking nice.
The Tools
You do not need much for this.
The honest baseline: a flat spade you probably already own. A flat-bladed spade, not a pointed digging spade, but the square-edged garden spade, cuts a clean edge. Angle the blade about 90 degrees vertical, step into it, pull the slice outward. Repeat around the perimeter of the bed. It takes longer than a dedicated edger, and in compacted clay soil you’ll feel it in your shoulders, but it works. For a small yard, there’s no reason to buy anything else.
The half-moon edger is the old-school manual option. Heavy steel blade, semicircular profile, designed for exactly this task. It cuts cleaner than a flat spade in tight-radius curves around shrubs and is easier to control. A decent one runs $20–35. If you’re re-edging overgrown beds from scratch and you want a purpose-built tool, this is the category to look at.
The rotary edger: the long-handled wheel-and-disc type, is better suited for maintenance passes along an established edge than for cutting from scratch. Once the trench is defined, a rotary edger can follow the line quickly. For the initial re-cut on a neglected edge, it won’t do much.
Power edgers ($80–120 for a Black+Decker or WORX corded/battery model) make sense when you have a lot of linear footage, think a large foundation bed that wraps the whole house, and doing it by hand isn’t practical. For a typical suburban property with a few shrub beds, you don’t need one. But if you’re edging 200+ linear feet twice a year, you might appreciate one.
The Frugal Fix
Tier 1, Minimalist
A flat garden spade or square-headed shovel from any hardware store. $15–25, and you may already own one. No affiliate link needed, just use what you have. If the edge is clean when you’re done, the tool did its job.
Tier 2, Rationalist
The pick: AMES Saw-Tooth Border Edger with T-Grip, 39-inch, around $30.
This is the one I own and use. You don’t need it, a flat shovel cuts a clean edge. But the saw-tooth blade on this one slices through roots and compacted soil noticeably faster, and the T-grip gives you real control on curves. I bought it in 2025. It’s the one tool from this whole project that I’d buy again without hesitation. For beds with established root competition from boxwoods or hollies, the difference is real.
Tier 3, Nut
The pick: a power bed edger (Black+Decker or WORX, corded or 20V battery), around $80–120.
For anyone with large bed perimeters where doing it by hand is genuinely impractical. Same result, less effort, more noise. If you’re already in the Black+Decker or WORX battery ecosystem from other yard tools, the battery edger is worth looking at, one battery, multiple tools.
When to Do It
The full re-cut: the real re-establishment of the edge trench, needs to happen once or twice a year. In the Southeast, the right windows are early spring before the first mulch refresh, and again in early fall if you refresh then too. The trench closes up over time as soil settles and grass creeps toward the bed. When you stop seeing a defined shadow line between the lawn and the bed, it’s time.
Maintenance between re-cuts is a different job. A string trimmer held vertically (blade running perpendicular to the ground) can clean up a week or two of encroachment without re-cutting the full trench. This keeps the edge sharp between seasons with minimal effort. The limitation: if the edge has softened badly, string trimmer maintenance is just cutting the top of the problem, not solving it. When the edge is more “approximate suggestion” than “clean line,” you need the edger.
How often, practically: the full re-cut 1–2 times per year; string trimmer touch-ups every 2–4 weeks during the growing season.
How to Apply It
Edging, technique
Cut the trench vertical, not angled. The blade should enter the soil perpendicular to the ground, straight down, not tilted toward the bed. You’re creating a clean drop-off, not a gradual slope. Depth should be 2–3 inches. Deep enough to create a visible trough that holds mulch inside the bed; not so deep you’re excavating the root zone of your shrubs.
Work in sections. Step into the blade, rock it slightly to lever out the soil plug, kick that plug back into the bed or collect it in a bucket. On compacted Georgia clay, you’ll want to wet the soil the night before if it hasn’t rained. Trying to cut a clean edge in bone-dry clay in July is a workout.
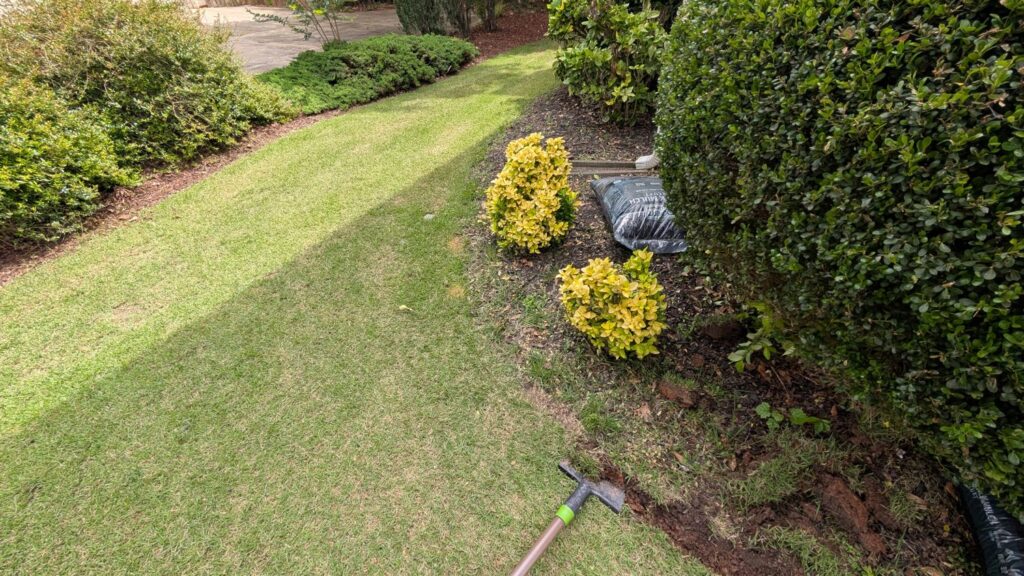
Edge first. Then mulch.
Always edge before you mulch. If you mulch first and then try to re-cut the edge, you’re cutting through the mulch you just laid and making a mess. Edge first, remove the spoil, then put the mulch down. The fresh-cut trench also acts as a natural lip that holds the mulch inside the bed.
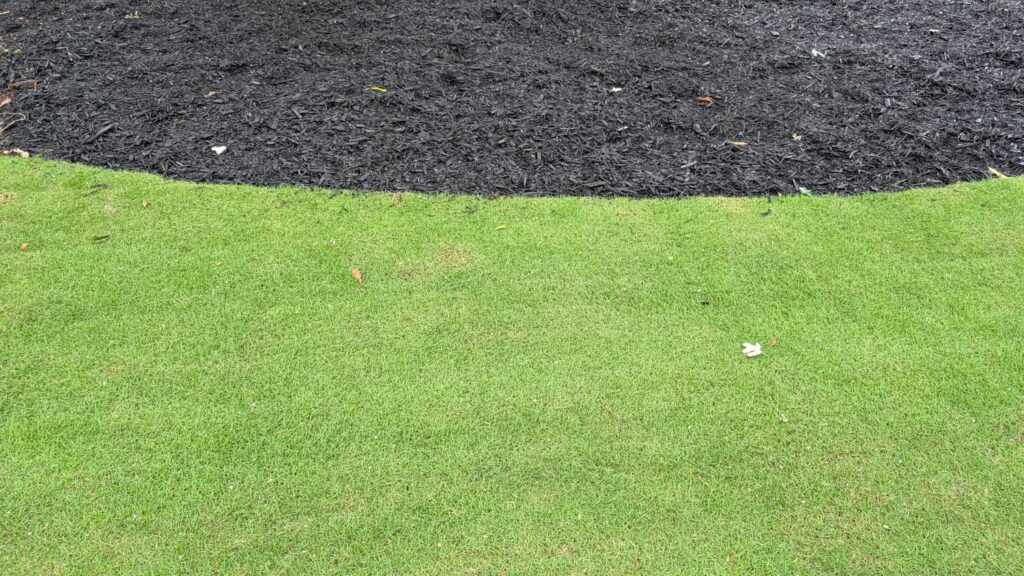
Mulch, what kind
Black dyed: my choice. The contrast against green zoysia and the dark soil reads as clean and intentional from the street. It holds color up to 12 months. The dye is iron oxide-based and safe. The tradeoff: it can stain concrete or pavers when wet. Keep it off the driveway.
Brown dyed: the most versatile, looks natural, fades less than black in the first season. Works with almost any house color. Good choice if you’re not sure.
Red dyed: bright, warm-toned. Works well with brick homes. Fades faster than black or brown; often made from recycled wood which degrades faster. Personal call.
Pine straw: the cheap Southeast default. Easy to spread, lightweight, naturally acidic, good for azaleas and gardenias. Weed suppression is weaker than bagged mulch, and it moves around in heavy rain more than mulch will. For casual beds or large areas around trees, pine straw makes sense. For manicured shrub beds where you’re spending the time to re-cut a clean edge, the visual payoff of actual mulch is worth the price difference.
Free wood chips (arborist chips): excellent for deep naturalized beds, around trees, anywhere you want 4+ inches of coverage to suppress weeds for years. Not right for the manicured edge around foundation beds, the chips are coarse and inconsistent, and they don’t pair visually with a crisp trench edge.
Mulch, how deep
2 to 3 inches. The 3-inch rule is the ceiling, not the goal. Two inches is fine. The point is consistent depth across the whole bed, not 1 inch in one corner and 5 inches against the shrub stems.
One bag of black dyed mulch = 2 cubic feet, which covers approximately 8 square feet at 3 inches deep. Before you go to the store, measure your beds so you know how many bags to buy. If you haven’t measured your beds yet, the GIS satellite tool works for bed perimeters too. You don’t need to walk the beds with a tape measure.
This year’s run was the front foundation beds: the boxwoods, the gold euonymus on the corner, and the curve out toward the driveway. Black dyed mulch, edged first with the saw-tooth tool, then filled to about two inches. The toy-shovel help didn’t speed anything up, but it’s the reason I look forward to this one every year.
What Not to Do
Volcano mulching. Do not pile mulch against tree trunks. This is the single most common mulching error and it kills trees slowly over several years. The bark is designed to be dry and exposed to air. Piling mulch against it keeps the bark perpetually wet, invites fungal decay, gives burrowing insects a protected pathway to the trunk, and causes the tree to grow adventitious (stress) roots up into the mulch layer that eventually girdle the trunk. The correct look is a donut, not a volcano. Pull the mulch back 3 to 6 inches from the base of any tree or shrub trunk.
Going too deep. More than 3 inches of mulch creates an anaerobic layer at the soil surface that suffocates roots and can cause root rot. Mulch is not better in direct proportion to depth. Two inches of consistent coverage outperforms 4 inches of inconsistent coverage every time.
Mulching before edging. Already covered, but worth repeating: always edge first. You’ll waste mulch and make a mess doing it the other way.
Skipping the re-cut and just topping off. This one is common. Every year, mulch breaks down and settles, and beds get refreshed by adding a new bag on top of the old layer. Over time, the bed level rises, the edge trench fills in, and you end up with mulch flush with or higher than the lawn. Then it washes and blows onto the turf. Pull back enough of the old mulch to re-cut the trench first, then refresh the layer.
Angling the edge inward toward the bed. The slope should go the other direction, or be vertical. An inward slope lets mulch roll out of the bed. A vertical or slight outward angle retains it.
Quick Reference
- Edge first. Mulch second. Always.
- Blade vertical, 2–3 inches deep, cut a defined trench.
- Full re-cut: 1–2 times per year. String trimmer maintenance: every 2–4 weeks.
- Mulch depth: 2–3 inches. No deeper.
- Pull mulch back from tree and shrub trunks, donut, not volcano.
- Black dyed mulch: 1 bag (2 cu ft) covers ~8 sq ft at 3 inches. Measure your beds before buying.
- Flat spade works fine. Dedicated saw-tooth edger works faster in compacted clay.
- The visual payoff is real and immediate, probably more visible improvement per hour than any chemistry you’ve applied.
Products Mentioned in This Article
- AMES Saw-Tooth border / manual edgeron Amazon
- Power bed edger (for big or root-bound bed lines)on Amazon
This site uses affiliate links. They don’t change what I recommend. They keep the lights on here.